Nginx 安装
check deploy-nginx-on-aliyun
- 查看 nginx 安装目录
ps -ef | grep nginx
- 查看配置文件 nginx.conf 路径
nginx -t
这条命令也可以用于检查配置文件是否正确。
当然也可以使用 find 命令进行文件查找
  // 从 / 根目录下查找文件名为 nginx.conf 的文件
  find / -name nginx.conf
  // 从 /etc 目录下查找文件名为 nginx.conf 的文件
  find /etc -name nginx.conf
启动 nginx
指定配置文件并启动 nginx 服务
nginx安装目录 -c nginx.conf配置文件目录
其中:参数 “-c” 指定了配置文件的路径,如果不加 “-c” 参数,Nginx 会默认加载其安装目录的 conf 子目录中的 nginx.conf 文件。
Nginx 的参数包括:
-c:使用指定的配置文件而不是 conf 目录下的 nginx.conf
-t:测试配置文件是否正确,在运行时需要重新加载配置的时候,此命令非常重要,用来检测所修改的配置文件是否有语法错误
-v:显示 nginx 版本号
-V:显示 nginx 的版本号以及编译环境信息以及编译时的参数
nginx -s reload 重启 nginx
tail -f /var/log/nginx/ 查看日志 tail -f /var/log/nginx/access.log
举例:
检测新的配置文件:/usr/local/nginx/sbin/nginx -t -c /usr/local/nginx/conf/nginx.conf
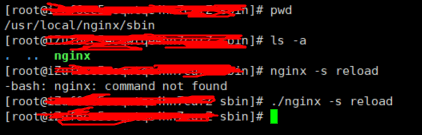
-bash: nginx: command not found 解决方案
我已经安装好了 Nginx,然后也把 Nginx 启动了,此时想重新加载一下 Nginx,然后输入命令,但是发生了下面的错误:
我将 Nginx 安装在该路径下: /usr/local/nginx
启动 Nginx,需进入路径:/usr/local/nginx/sbin
进入上述路径后,启动 Nginx:
./nginx
但是要调用这个东西的时候都要到这里来,那就有点麻烦了,所以
- 就干脆把 Nginx 的路径配置到系统变量中,配完需要重启系统
注—-后来发现使配置文件生效不需要重启系统,只需要输入
source /etc/profile
让配置文件重新生效一下即可
修改 vim /etc/profile 文件里面的内容
- 或者另一种方法,
ln -s /usr/local/nginx/sbin/nginx /usr/local/bin/
也可以全局访问 nginx.
ln –s 源文件 目标文件
源文件: /usr/local/nginx/sbin/nginx 就是 nginx 位置
目标文件: /usr/local/bin/ 就是环境变量目录
Linux ln(英文全拼:link files)命令是一个非常重要命令,它的功能是为某一个文件在另外一个位置建立一个同步的链接。 n 的链接分 软链接 和 硬链接 两种:
软链接就是:“ln –s 源文件 目标文件”,只会在选定的位置上生成一个文件的镜像,不会占用磁盘空间,类似与 windows 的快捷方式。
硬链接 ln 源文件目标文件,没有参数-s, 会在选定的位置上生成一个和源文件大小相同的文件,无论是软链接还是硬链接,文件都保持同步变化。
删除硬/软链接用 rm softlink_file 或者 unlink softlink_file
ll 软连接(softlink_file) 查看到软连指向的具体文件
关闭 nginx
nginx -s stop 或 pkill nginx
宝塔
宝塔 Linux 面板 https://www.bt.cn/: 是提升运维效率的服务器管理软件,支持一键 LAMP/LNMP/集群/监控/网站/FTP/数据库/JAVA 等 100 多项服务器管理功能。
bt default 查看面板地址,登录用户名密码
cd /www/server/panel/data –> cat admin_path.pl 查看面板地址初始的机器码
命令配置
nginx 配置单页应用之路由匹配以及 404 页面
  location / {
    try_files $uri $uri/ /index.html;
  }

  error_page  404  = [the page that you want to redirect to, for example https://www.baidu.com];
  error_page  403  = [the page that you want to redirect to, for example https://www.baidu.com];
  try_files指令
  语法:try_files file ... uri 或 try_files file ... = code
  默认值:无
  作用域:server location
  这种写法try_files $uri $uri/ /index.html;就会导致所有找不到的url都会跳转到index.html文件。
多页应用路由配置
文件结构如下
- root
- homepage
- index.html
- homepage.css
- homepage.js
- subPage1
- index.html
- homepage
server {
  listen 443 ssl;
  server_name [myservername];
  root [filepath/root];

  ssl_certificate [cert.pem];
  ssl_certificate_key [cert.key];

  location / {
     if (!-e $request_filename){
     	rewrite ^(.*)$ /$1.html	break;
     }
  }

  error_page 404 403 500 502 503 504 =  [the page that you want to redirect to, for example https://www.baidu.com];
}
配置 https(443)
  server {
        listen 80;
        server_name [server name];
        return 301 https://$server_name$request_uri;
  }
  server {
        listen 443 default ssl;
        ssl_certificate   [pem path].pem;
        ssl_certificate_key  [key path].key;
        server_name [server_name];

        root [root path];

        location / {
                try_files $uri $uri/ /index.html;
                proxy_http_version 1.1;
                proxy_set_header Upgrade $http_upgrade;
                proxy_set_header Connection 'upgrade';
                proxy_set_header Host $host;
                proxy_cache_bypass $http_upgrade;
                proxy_set_header X-NginX-Proxy true;
                proxy_set_header X-Real-IP $remote_addr;
                proxy_set_header X-Forwarded-For $proxy_add_x_forwarded_for;
                expires 300;
        }
  }
负载均衡
reference https://www.youtube.com/watch?v=vaUZIrL7v0I&list=PLmOn9nNkQxJFqjd8stdqdXgTnDDpr0baO&index=17
在 http 配置中添加 upstream.
http {
  upstream [myserver] {
    server [server1];
    server [server2];
  }

  server {
    listen 80;
    server_name [server name];
    location / {
      proxy_pass http://[myserver];
    }
  }
}
nginx 负载均衡分配服务器策略
-
第一种 轮询(默认) 每个请求按时间顺序逐一分配到不同的后端服务器,如果后端服务器 down 掉,能自动剔除
-
第二种 weight weight 代表权重默认为 1, 权重越高被分配的客户端越多
 upstream [myserver] {
    server [server1] weight = 1;
    server [server2] weight = 1;
  }
- 第三种 ip_hash 每个请求按访问 ip 的 hash 结果分配,这样每个访客固定访问一个后端服务器
 upstream [myserver] {
    ip_hash;
    server [server1];
    server [server2];
  }
- 第四种 fair(第三方) 按后端服务器的响应时间来分配请求,响应时间短的优先分配
 upstream [myserver] {
    server [server1];
    server [server2];
    fair;
  }
动静分离
添加 autoindex on; 可以罗列出目录下文件
location /image/ {
  root [file path];
  autoindex on;
}
配置请求某个简短内容的文件
场景如:微信公众号开发过程中需要配置JS接口安全域名
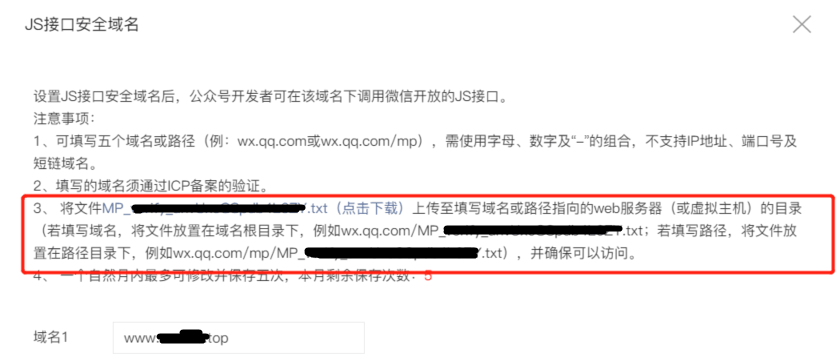
  location /[fileName].txt {
      return 200 '[short content]';
  }
高可用(主从配置)
a. 需要两台nginx服务器
b. 需要安装keepalived yum install keepalived -y ,在etc里面生成目录keepalived/keepalived.conf
c. 需要虚拟ip

启动keepalived: systemctl start keepalived.service
配置keepalived:
// 全局配置
global_defs {
  router_id [服务器名字] //通过这个名字可以访问到主机
}

// 检测脚本配置
vrrp_script chk_http_port {
  script "[脚本路径]" // 例如 "/usr/local/nginx_check.sh"
  interval 2 // 检测脚本执行的间隔,单位s秒。每个2s执行一次脚本
  weight 2 // 权重,脚本条件成立时对当前权重+2
}

vrrp_instance VI_1 {
  state MASTER // 备份服务器上将MASTER改为 BACKUP
  interface [绑定的网卡]  // 例如 interface ens33,通过ipconfig 查看
  virtual_router_id 51  // 主、备机的virtual_router_id 必须相同
  priority 90  // 主,备机取不同的优先级,主机值较大,备份机值较小
  advert_int 1  // 每个多长时间发送一次心跳检测主备机是否活着,这里指1s秒
  authentication {
    // 权限校验方式,PASS指代密码校验方式
    auth_type PASS
    auth_pass [密码]
  }
  virtual_ipaddress {
    192.168.37.1  // VRRP H虚拟地址
  }
}
/usr/local/nginx_check.sh 内容如下
  #!/bin/bash
  A= `ps -C nginx -no-header | wc -1`
  if [$A -eq 0]; then
    /usr/local/nginx/sbin/nginx   # nginx启动位置
    sleep 2
    if [`ps -C nginx --no-header | wc -1` -eq 0]; then
      killall keepalived
    fi
  fi
master & worker
worker数和服务器的cpu数相等是最为适宜的,
连接数worker_connection
-
发送请求,占用了work的几个连接数? 答案是2个或4个,如果是访问静态资源就是2个(一个请求一个返回),如果访问数据库就是4个
-
nginx有一个master,有四个worker,每个worker支持最大的连接数为1024,支持的最大并发量是多少? 答案:普通的静态访问最大并发量是 worker_connections * worker_process / 2, 如果是Http为反向代理最大并发数量应该是worker_connections*worker_process/4
错误解决方案
- [emerg] unexpected “}”
解决方案: 大括号里面每行结尾需要分号的
其他
-
查看进程列表(条件过滤)
ps -ef | grep nginx -
直接查看进程 pid
ps -C nginx -o pid -
查看 80 端口运行的程序
netstat -anp | grep :80
openssl generate local cert
-
openssl> genrsa -des3 -out {path}/server.key 2048 -
openssl> req -new -key {path}/server.key -out {path}/server.csrif we face
Unable to load config info from /usr/local/ssl/openssl.cnfissuewe can use openssl.cnf in git
openssl> req -new -key {path}/server.key -out {path}/server.csr -config "C:\Program Files\Git\mingw64\ssl\openssl.cnf" -
生成秘钥 写 RSA 秘钥
openssl> rsa -in {path}/server.key -out {path}/server_nopwd.key -
生成 CA 证书 获取私钥
openssl> x509 -req -days 3650 -in {path}/server.csr -signkey {path}/server_nopwd.key -out {path}/server.crt